Permit Categories can be created and edited from the Settings page. (N.B. Only Wallet Administrators have access to the settings page.)

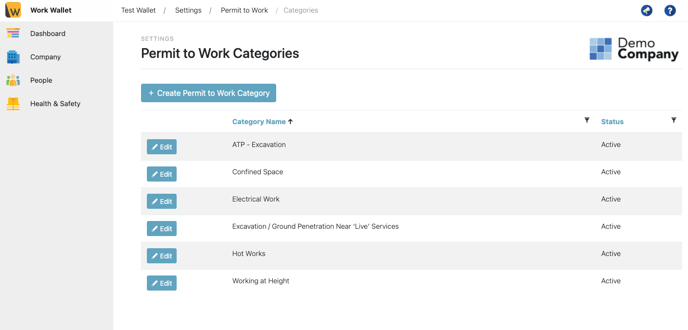
Select Permit to Work Categories, this will bring up a page displaying any Permit to Work Categories. To edit a Category simply click the edit button next to the Category, make your changes and click save.
To create a new Category click Create Permit to Work Category, this will load the create page.
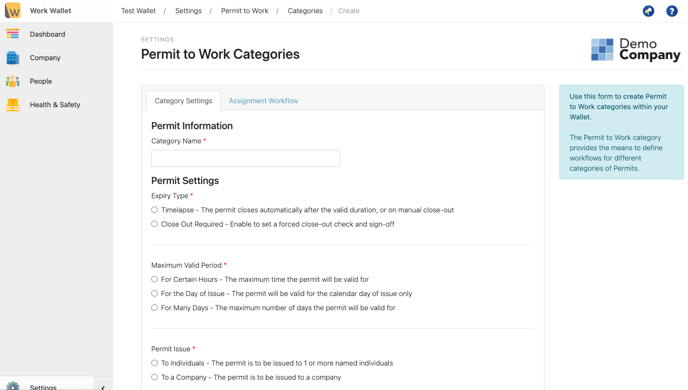
Give the Category a name and choose an expiry type, maximum valid period and who the permit can be issued to. Next Click the Assignment Workflow Tab. You can add as many sections as you like. Simply click add new section, give the Section a name and click save.
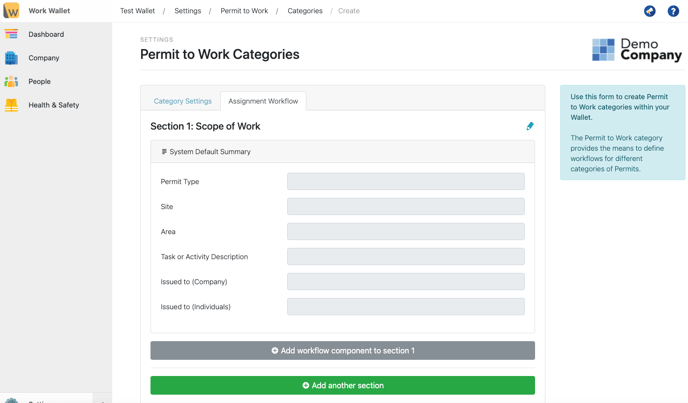
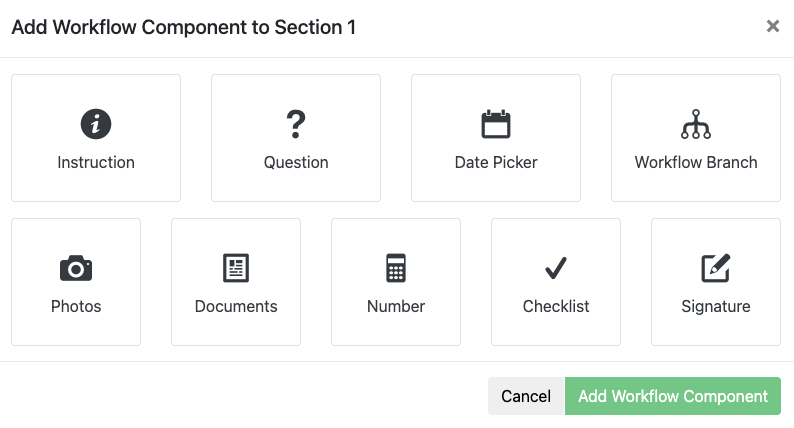
You can add as many workflow components to each section as you like. Just select Add Workflow Component and chose the type of component you want to add. You can add Instruction, Checklist, Question, Signature or Photos with Standard Permits or with Permits + (also included in the All In Bundle) you also get Workflow Branch, Date Picker and Number.
If you have chosen that a close out is required for this permit type, click the Close Out Workflow Tab. Add as many sections and Workflow Components as you like, in the same way as for the Assignment Workflow. Once you are happy click Save Permit to Work Category.
*Please note for any item that needs completing via the Contractor Management Gateway, you must select on the item 'Allow External Data Entry' for this to appear on the gateway :
