To begin, the first step is to access the Kiosk by logging in.
If you have a contact QR code (these are accessible from the Work Wallet portal for all users and contacts, through the Work Wallet App for App users and also provided to you when you complete an induction through Work Wallet ) simply click scan in:

And hold up your QR code to the tablets front facing camera.
If you are unable to access your QR Code, you can click on the Log in button instead. From there, you can select your company from the drop-down menu. If you are already a registered user of Work Wallet, choose the option "Already Registered" and search for yourself by entering your last name. Then, enter your pin to log in.

If you are a new user of Work Wallet, you can select the option "Register New Contact" and fill out the form to create your contact record.

After successfully logging into the Kiosk, you will be directed to the Kiosk Home Page. Then select Submit a Permit.

You will then need to select the type of Permit you would like to create.

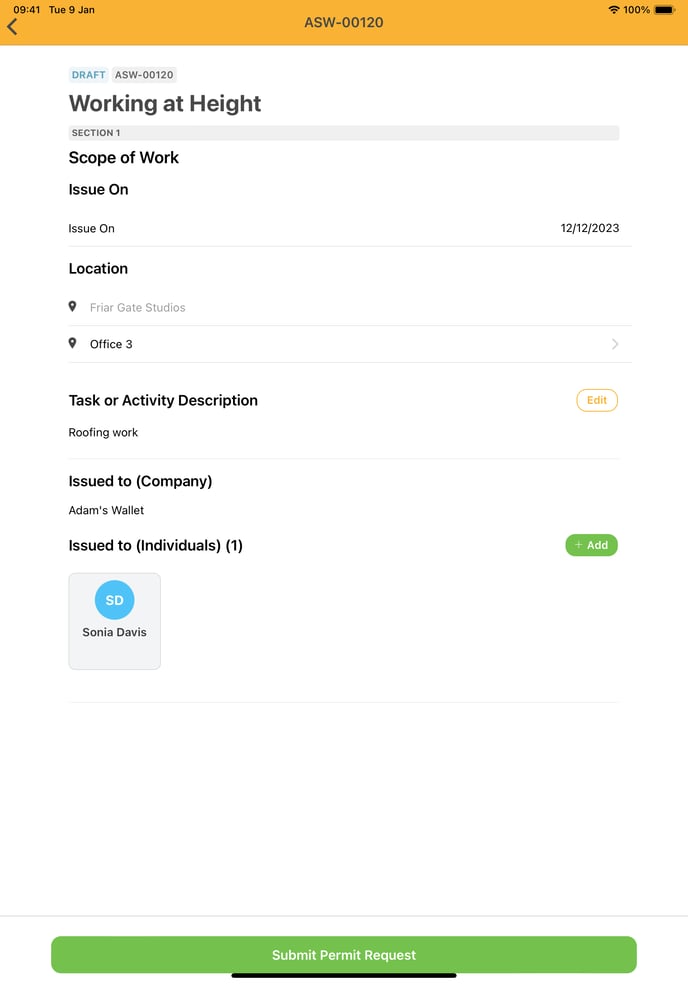
For this one we have gone for the Working at Height Permit, ensure all details input are correct, we will then select the submit permit request button at the bottom of the screen.
You will then be presented with the site managers for that site. Select which staff you wish to be notified of your permit request and click Submit Update.
.png?width=688&height=985&name=MicrosoftTeams-image%20(29).png)
The site team you have selected will be notified of your permit request for them to approve.