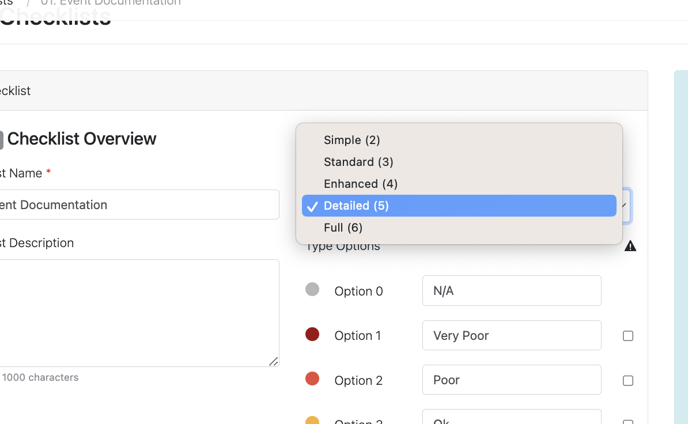
When creating an audit checklist you create the different responses available for each question, you can choose the number of responses available and change the wording for each option to suit your needs. You can use these response options to score the audit.
To change the amount of responses within your checklist, select the number or response you need from the dropdown. Then reword the response options to suit your requirements in the text fields next to each option.
For these responses to result in an audit score, ensure that you have ticked the 'Enable Scoring' checkbox, then select which response option would equal a pass for this audit.
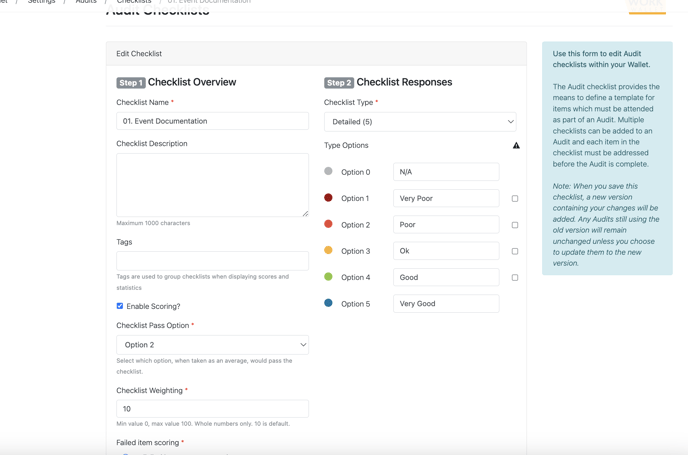
You can also set a checklist weighting. The default is for all checklists to have a weighting of ten but you can change this to weight the checklist differently. For example, if you wanted a particular checklist to be worth double in the audit scoring you can change the weighting to 20. You can also choose if failing one item in the checklist sets the score for the entire checklist to zero.
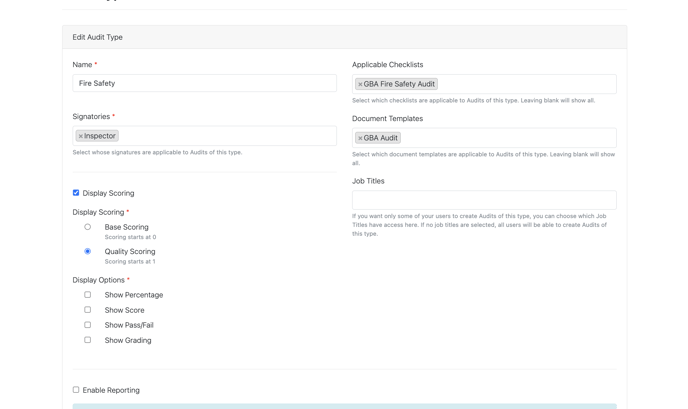
Once you have enabled the scoring on your checklists you can then enable scoring for the Audit Type. Select an Audit Type from within the Settings page. You will see a tick box called Display Scoring. This will provide the option to choose between Base or Quality Scoring and scoring options from: Percentage, Average Score, Pass/Fail and Score Grading.
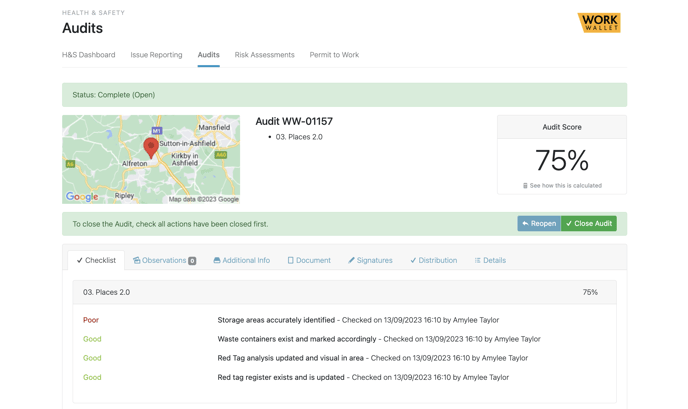
Depending on what Display options you choose, these will be shown when he Audit is completed under Audit Score.
If you would like the scoring options to pull through on the document template you will need to add the relevant data tags provided within the Audit Design Template section on to your template design.