With Zapier, you can integrate with over 5,000 other applications to provide rich data sharing options. If you haven't yet got started with Zapier, please see our other guide for Integrating with Zapier.
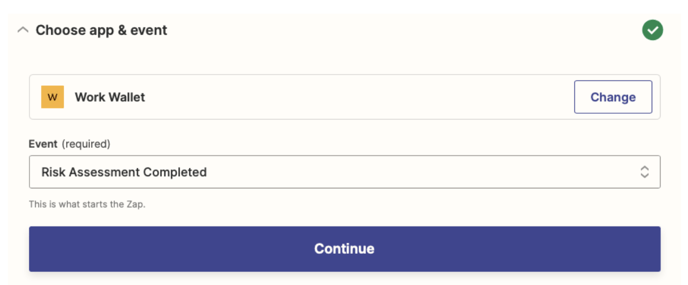
In this article, we are looking at the specific 'Risk Assessment Completed' Event which can be found in Work Wallet's Zapier Event list. This event is triggered when you mark a Risk Assessment document as 'Complete' in the Work Wallet system. Note: In Progress Risk Assessments will not trigger this event.
When creating your Zap, first select the Work Wallet application, then the 'Risk Assessment Completed' Event. Click to Continue.
Select your Work Wallet account and Test the Trigger to continue to your action.
In this example, we will look at a Zap to store the completed Risk Assessment document in OneDrive, but you can use the basis of this guide to create any integration your imagination can muster!
First, choose your app & event - in this example, the app is OneDrive and the Event is 'Upload File'
Then, you need to set up the action you want the Zap to take when a new Risk Assessment document is created. There are 5 data points that will come over with the Audit data, and you can use this information to form part of the actions that you want to complete.

- Risk Assessment Date - The noted date in Work Wallet the Risk Assessment is set
- Risk Assessment Identifier - A unique ID to support integrations
- Risk Assessment Document - the URL of the Risk Assessment file
- Risk Assessment Operating Location - The location the Risk Assessment is specified for. This will either return the name of the site or the name given to the General Location
- Risk Assessment Reference - The unique Work Wallet Risk Assessment / Document Reference
We can use these data points to customise our OneDrive integration as desired. Firstly, we need to choose which folder to put the document in. If the folder doesn't exist, Zapier will create a new folder with the name specified.
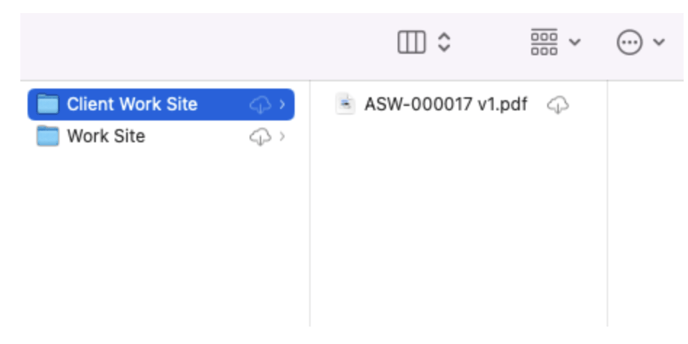
In this example, we have created a root folder called /Zapier and then a Sub Folder with the name of the site the Risk Assessment was completed at. This can be helpful as any subsequent documents completed at this site, will also get saved in the corresponding folder.
To do this, we have selected the 'Custom' folder option and manually added the /Zapier/ folder name. After that we have selected the 'Risk Assessment Operating Location' data point, which will dynamically create the folder, based on the site name.

Then, we need to select the file. This is as simple as selecting the 'Risk Assessment Document' data point as shown below.

The final step is to then set the file name. You can take some creative liberty here such as using the Site Name or custom wording - or you can simply choose the 'Risk Assessment Reference' data point.
Important: You must add a .pdf file extension at this stage, for the document to import correctly.

That's it! Test your action to check everything's working as expected, by either viewing your OneDrive online or on your desktop device sync. Any new folders will be created automatically and your new Risk Assessment document will be saved and ready to view.