Work Wallet has a powerful Risk Assessment Feature that allows you to build job specific Risk Assessments in a matter of minutes.
Key features available are:
- Build Consistent and Specific Risk Assessments
- Full Version Control
- Automatic Distribution
- Customisable Templates and Document Layouts
- Mobile App Support to Create and Update Documents on the go
An overview of the Risk Assessment feature can be found here.
Before you create your first Risk Assessment you will need to complete some set-up tasks to ensure all the relevant data is available.
1. Create your RISKS/Hazards
The first step you will need to take is to create your Work Place RISKs/Hazards within the settings area of the portal. The Risks you create here will be used in the creation of your Tasks and Risk Assessment documents.
For more information in managing your RISKs you can read our article here.
2. Create your PPE Types
Next you will need to create your "PPE", this is also done from the Settings area of the portal. Equipment listed here will be available to assign to Tasks to advise on what equipment is required to complete the Task safely. For more information on setting up Equipment Types you can read our article here.
3. Create your COSHH Assessments
Now you will need to add your COSHH Assessments to the portal. Like the previous steps this can be done from the "Settings" area and will involve uploading your COSHH Assessment sheets so they can be stored in the portal. Like the "PPE Types" these can then be attached to a relevant task.
For more information on how to upload COSHH Assessments please see our article here.
4. Create your Tasks
Next you will need to create your Tasks. Tasks are a collection of jobs your workforce may encounter when working, they allow you to group together the RISKS, Equipment and COSHH assessments you created earlier. These can then be quickly and easily populated into your Risk Assessments by selecting the relevant Tasks.
Tasks are also managed in the "Settings" area of the portal like the previous steps. Select the "Tasks" link in the Health & Safety portion of the menu. From here you can create and edit your Tasks, selecting what RISKs, Equipment and COSHH assessments are associated.
For more information on Tasks you can access our article here.
5. Upload your RISK Assessment Design Template
This stage isn't mandatory as Work Wallet provide a default pre-set Risk Assessment template that can be used to generate your documents. If, however you wish to customise this with your own design this is possible through the "Settings" menu by clicking on the link "RISK Assessment Design Templates".
From this menu you can either download the current template to make adjustments before re-uploading, or, using the template guidelines upload your own template design.
For more information on managing Risk Assessment templates you can read our article here.
6. Creating your RISK Assessment
Now you are ready to create your first RISK assessment. You can do this either from within an open Job, or, from the "Risk Assessments" tab within the Health & Safety section of the portal.
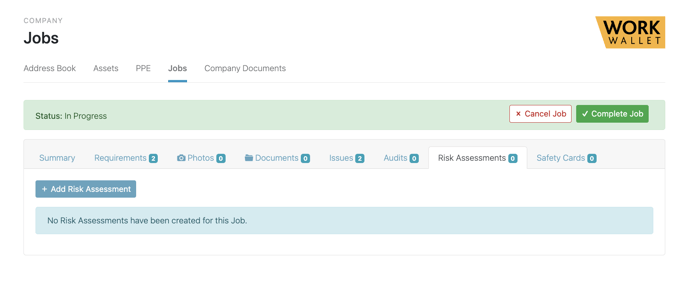
Image 1: Risk Assessment tab within a job
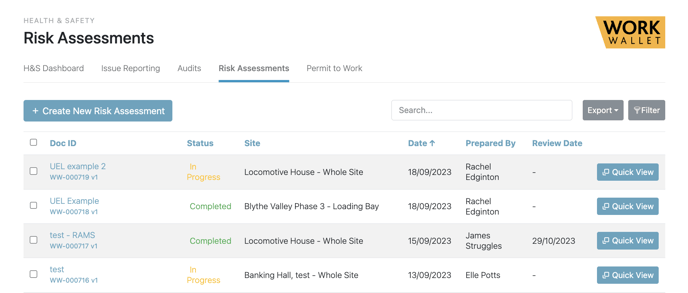
Image 2: Risk Assessments tab within the Health & Safety area of the portal
When you create your new Risk Assessment you will be asked to fill in the following sections:
- Document Information
- Location Information
- Safety Information
Document Information
Here you will select whether a Risk Assessment is for a General Location or a specific job.
If you select that it is for a specific job you will need to pick the associated job number, doing this will then link the Risk Assessment to that job and auto complete the rest of the document information section from details previously captured within that job. (If you chose to create your Risk assessment from within a job it will automatically be linked and show this prefilled information).
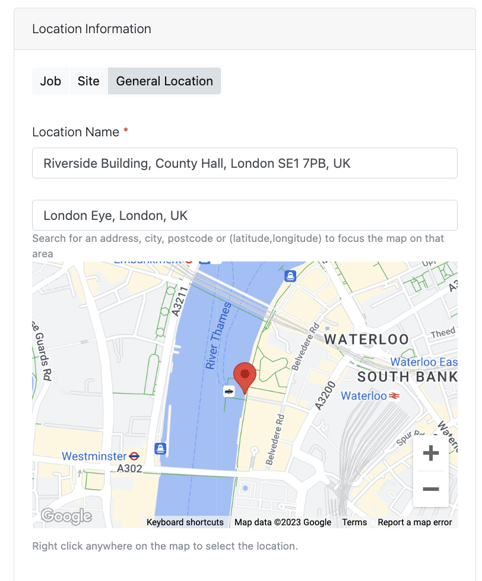
Location Information
In this section you will need to select the site location for the Risk Assessment.
Like the Document Information section, if this Risk assessment is linked to a job this data will already be completed.
Alternatively, you can type in the exact address or postcode of the site location - or select the General Location tab, right click on the map, and select the general location manually (which is particularly useful, for instance, for large sites which are under construction and may not yet have an official address).
In addition, the system should then automatically search for and find information for the nearest available hospital to the location.
Safety Information
In this section you will define what Tasks will be incorporated within your assessment as well as what template will be used to generate it.
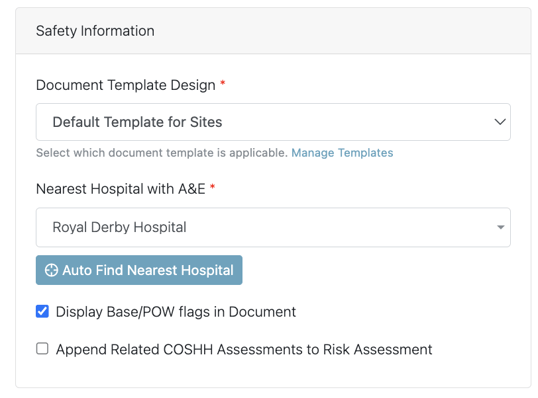
Once you click the "Select Tasks" button you will be shown a list of all the Tasks you previously created within the "Settings" menu.

All you need to do is select those Tasks you wish to include. All the associated information will then be ported into your assessment.
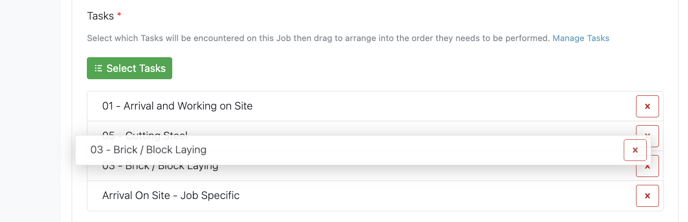
Once you have selected all the Tasks you wish to include you have the opportunity to reorder the Tasks by dragging and dropping them. Once you are happy you can click "Create New Risk Assessment".
Your assessment will now be ready for review along with your document preview.
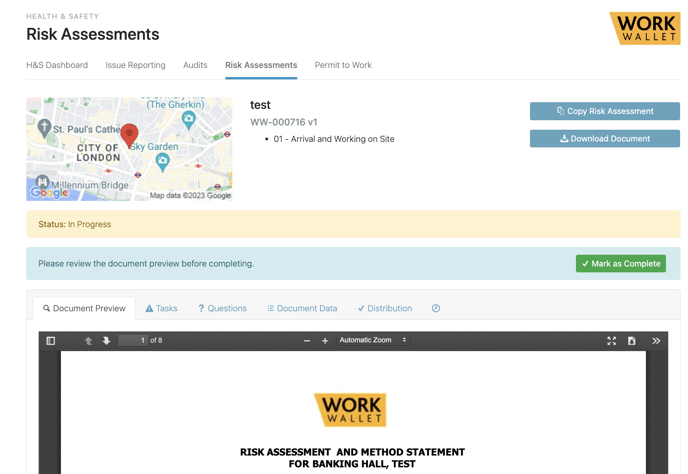
You have now successfully created your first Risk Assessment!
From here you can review your document before it is approved, as well as editing the document data, distribution and version history.
For further information on the Risk Assessment feature within Work Wallet please see the Risk Assessments category on our Knowledge Base by clicking here.